


How to Build a Sturdy Floating TV Console for Your HDB Living Room?The allure of a sleek, floating TV console is undeniable, especially in Singapore's often compact HDB living spaces. Floating designs maximize floor space, simplify cleaning underneath, and create a stunning minimalist focal point. But achieving that look with confidence requires knowing how to build a floating TV setup that's truly sturdy, safe, and complements your specific flat. Forget creaky shelves or worrying about expensive electronics; this guide cuts through the fluff to give you the real-world steps and considerations needed, tailored for our unique HDB environment.
Mastering the Mounting: The Foundation of Stability
Building a floating TV console starts where it ends: invisibly, anchored securely to your wall. HDB walls require specific considerations:
1. Solid Substructure is Non-Negotiable: Forget lightweight solutions. The primary frame must be incredibly rigid. Using a minimum of 70mm x 45mm thick (or higher-grade) kiln-dried C24 Structural Timber for the main frame provides the necessary backbone. This timber acts as the chassis taking the load.
2. Mastering the Mount: How you attach the frame to the wall is paramount. Absolutely essential are thick steel oversized wall brackets or specifically designed floating shelf brackets rated for significant loads. Do *not* trust standard shelf brackets or flimsy L-brackets.
3. Finding True Support - HDB Wall Construction: Singapore HDB walls are often complex layers. You must securely anchor into a masonry (concrete/brick) layer or a sturdy metal wall stud. Crucial step: Use a reliable stud finder *and* tap testing to pinpoint the underlying structures. Utilize serious fixings:
- For masonry: High-grade 80mm (or deeper) toggle anchors or expanding Dynabolts designed for masonry. Ensure they penetrate the solid core.
- For steel studs: Use heavy-duty wall anchors rated for steel stud installation, following the weight specifications precisely. They grip internally without buckling the stud. Install into the stud's thickest point.
Use multiple, heavy-duty brackets – at least 3 for a standard console width, spaced according to weight distribution. Adhere strictly to the weight limits specified by the bracket *and* anchor manufacturer. This meticulous approach ensures the console stays firmly against the wall without any hint of sagging.
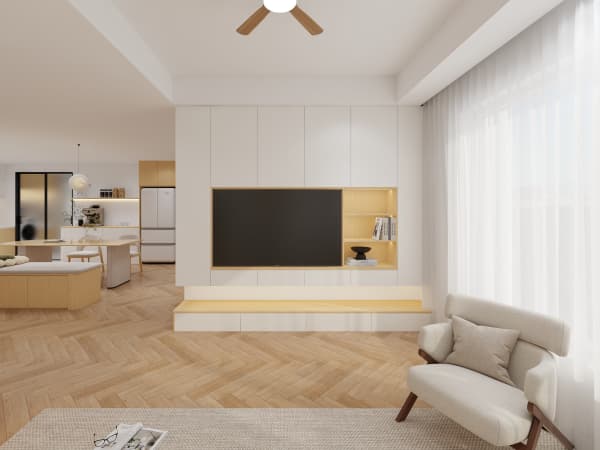
Building for HDB Constraints: Weight, Space & Details
Singapore homes have specific challenges like space limitations and unique layouts. Design with these in mind:
1. Weight Dictates Materials: While the frame is sturdy timber, the exterior can be lighter material like high-grade plywood or MDF board. However, focus on build structure. A robust plywood base layer, screwed securely to the solid timber frame, creates a stable platform.
2. Cable Management is Integral: Few things ruin a floating aesthetic more than dangling wires. Plan dedicated cable channels *inside* the frame structure or routing systems leading to wall ports before the console is permanently installed. This requires drilling precise holes during the framing stage.
3. Battling the Humidity: Singapore's moisture can warp wood. Use material specifically treated for interior tropical use or sealed correctly. Quality laminated sheets and MDF designed for interior furniture offer resilience. Proper sealing and finishes are vital for longevity.
4. Visually Harmonizing: Depth is critical. Measure your 55" or 65" TV depth, add room for devices like Set-Top Boxes and soundbars (typically 10-20cm deeper than the TV), and factor in *your* viewing comfort. The console shouldn't dominate the room or feel too shallow. Dimensions also matter: Verifying precise clearance against your BTO or apartment floorplan avoids blocking essential walking paths or bay windows.
Enhanced Safety & Practical Features
A floating console should be both beautiful and functional over the long term.
1. The Anti-Tip Imperative: Children and pets make stability paramount. The primary anchoring method described earlier is crucial. For added security if the design allows (e.g., back panels extend upwards), use small, discrete wall straps attached to the console's rear framework, secured into wall anchors, stopping any potential forward tilt.
2. Easy-Access for Connections: Fumbling behind a console is frustrating. Incorporate either removable panels built into the design above service streets, or ensure sufficient finger space at the top/rear for reaching HDMI ports.
3. Ventilation Considerations: Electronics generate heat. Avoid fully enclosing vital devices like AV receivers or gaming PCs. Design open or ventilated shelves for heat-producing units, hide cool-running boxes in discreet corners. Ensure air circulation with strategic rear openings.
4. Surface Resilience: Choose finishes that offer scratch resistance and ease of wiping down. High-pressure laminates are durable choices; laminate wood veneers offer aesthetics with protection; or use solid hardwood sealed with durable polyurethane finishes. Ensure all finishes meet local E1 low-emission standards.
How to Build a Sturdy Floating TV Console for Your HDB Living Room?


